
Before you begin
-
Do not use this guide if your YubiKey was purchased directly from SSL.com and the pre-installed code signing certificate is still valid. No additional setup is required. You can immediately begin using your certificate by following this guide: Using Your Code Signing Certificate.
This guide is intended only for customers whose attestation submission has already been approved by SSL.com and who need to install or replace a code signing certificate on a YubiKey.
Use this guide if either of the following applies:
- You purchased a blank YubiKey directly from Yubico and successfully completed the attestation process described in the SSL.com guide: Key Generation and Attestation with YubiKey for Code Signing Certificates.
- You are replacing an expired code signing certificate on your YubiKey and have successfully completed the required attestation process described in the same guide.
Step 1: Download your Code Signing Certificate
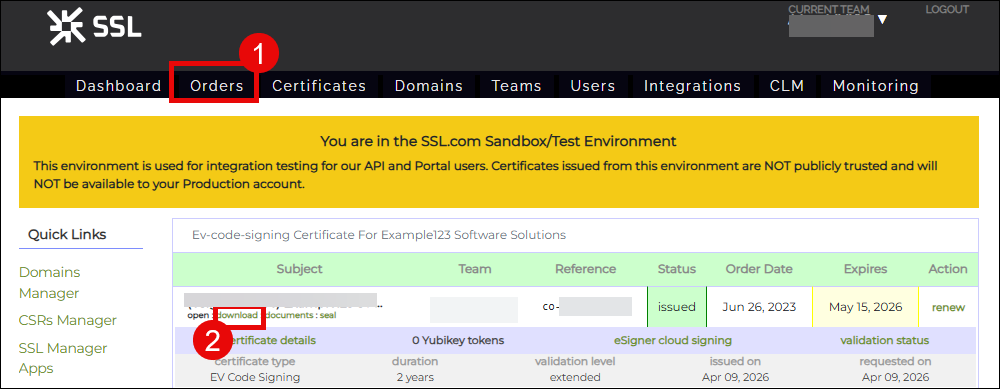
- Once SSL.com approves your attestation and issues your certificate, you can now download it. To do this, log in to your SSL.com account and click Orders from the top menu. Locate your order from the list and click the download link.
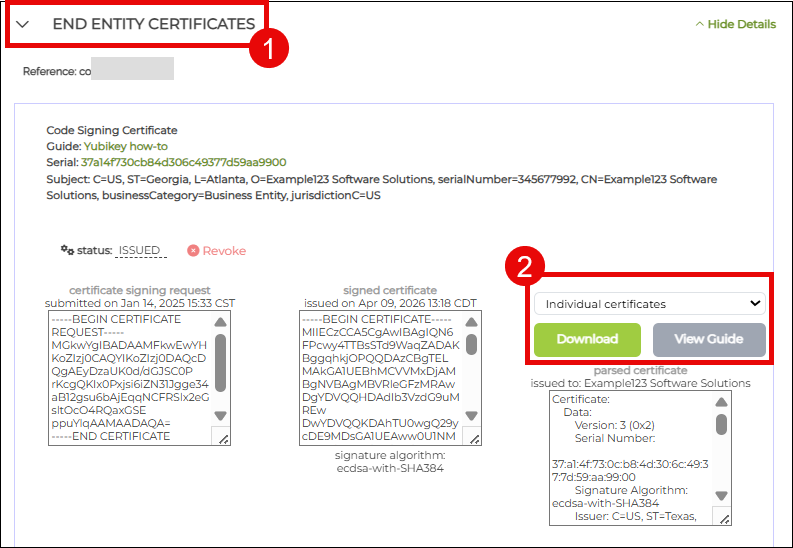
- When the download page is displayed, scroll down to END ENTITY CERTIFICATES section. Click the accordion arrow to display your certificate details. To the right you will see the download format options available. Choose individual certificates and click the Download button. This is a zip file containing three certificate files: your end-entity certificate, an intermediate certificate, and a root certificate. Later, you will only need to import the end-entity certificate to your YubiKey.
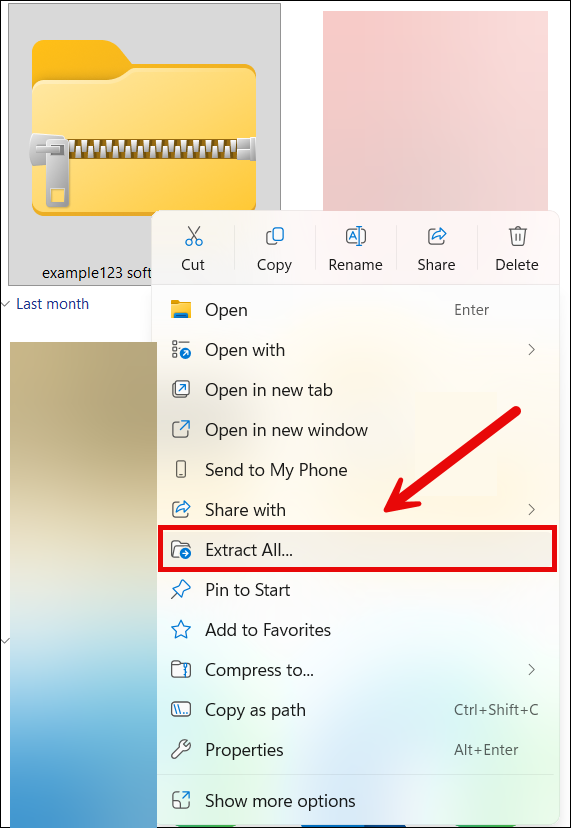
- Extract the downloaded zip file.
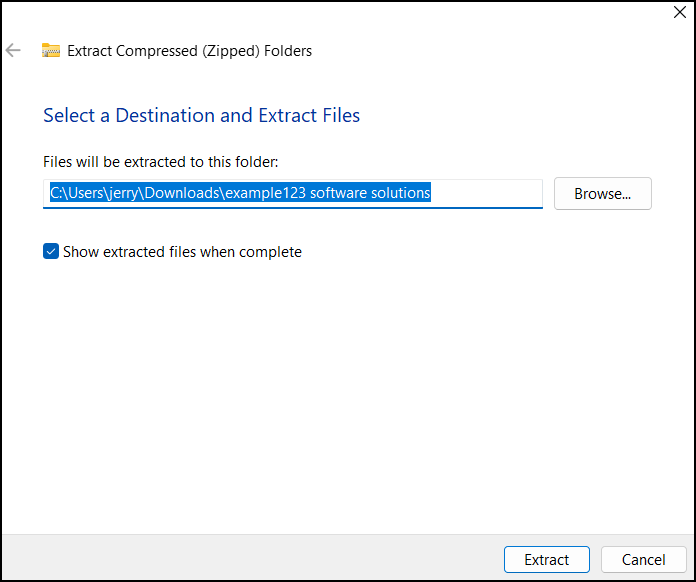
- Choose where to extract the files and then click the Extract button.
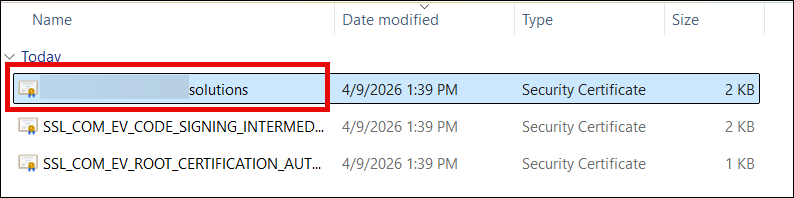
- Open the folder containing the extracted certificates. You will see three certificates but you will only need to install your end-entity certificate which is a .CRT file and bears the name of the person or organization. From here, you are now ready to install your certificate.
Step 2: Install Certificate in YubiKey
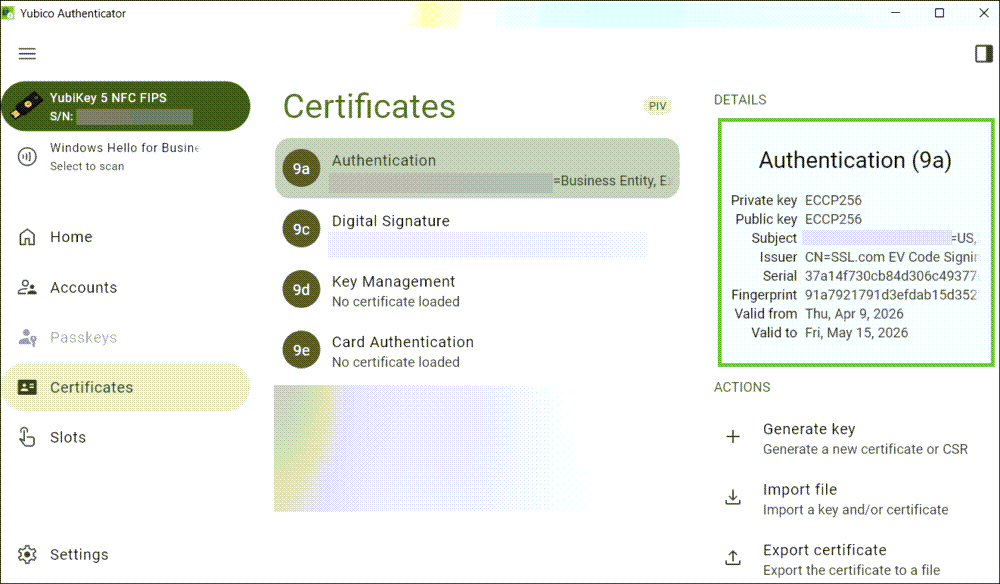
- Open Yubico Authenticator
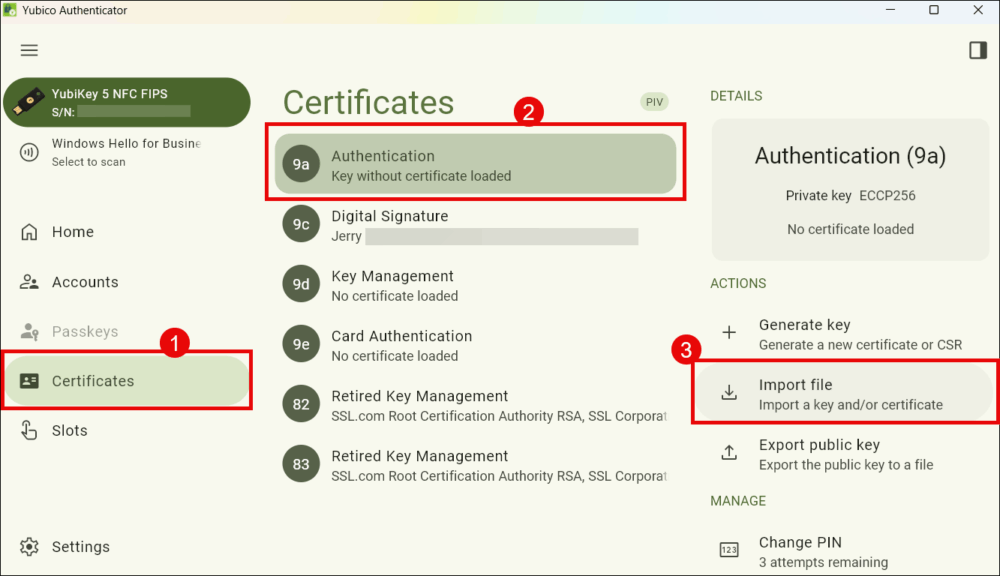
- Click Certificates, followed by 9a Authentication, and Import file.
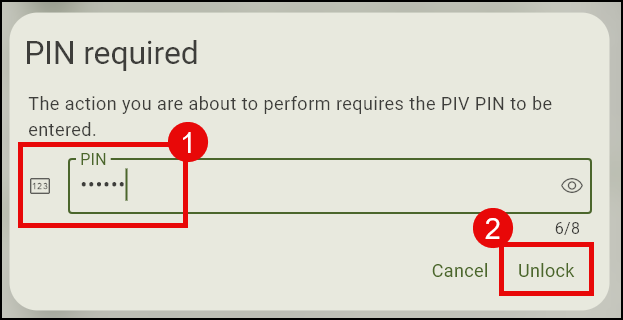
- Enter your YubiKey PIN when prompted.
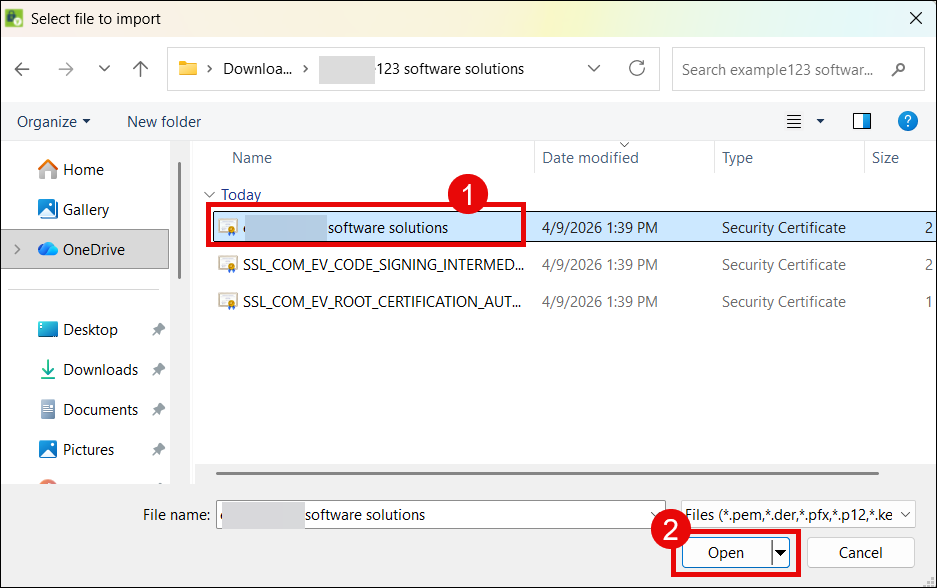
- Navigate to the folder where the certificates were extracted and click your end entity code signing certificate.
- Yubico Authenticator will display the details of your code signing certificate. Click Import button.
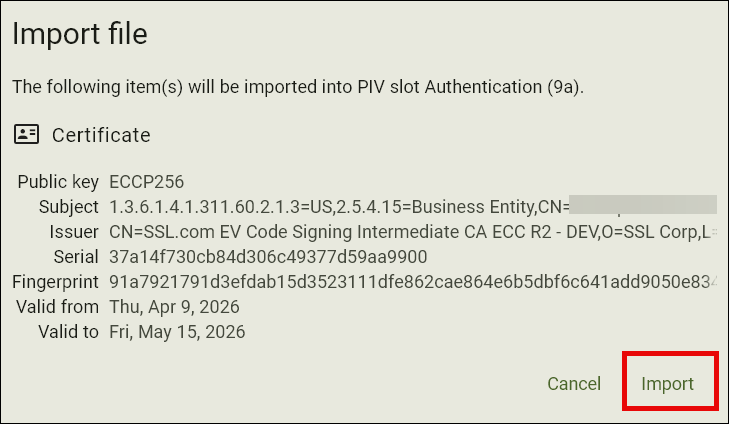
- Your certificate is now successfully installed.
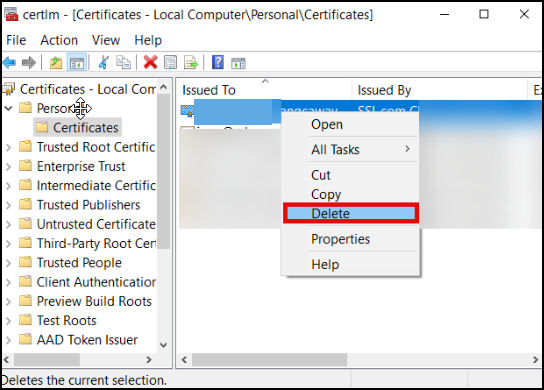
- Optional step: If you are a customer who replaced an expired certificate in your YubiKey, you will also need to delete the copy of the expired cert that is still in the Windows certificate store. To do this, type certmgr on the Windows search bar of your computer. Next, click Manage computer certificates. Click the Personal folder, locate the expired signing certificate, right-click it with your mouse, and choose Delete.
Related Guides to Signing Code with your YubiKey
- Using Your Code Signing Certificate: Learn how to sign applications using your OV or EV code signing certificate with Microsoft SignTool.